7 Steps to Customizing LED Strips
LED strips are highly favored by manufacturers due to their small size, flexibility, vibrant colors, brightness, easy customization, and eco-friendliness. No longer limited to shopping malls, interior decoration, KTVs, and bars, LED strips are now being integrated into products such as vanity lights, TVs, robots, coffee machines, water dispensers, and furniture.
As a professional LED strip supplier, we frequently collaborate with clients to address unique customization needs. Below are the key factors to consider when customizing LED strips for specific applications:
Custom LED Strip Process
Before communicating with an LED strip manufacturer, identify your needs:
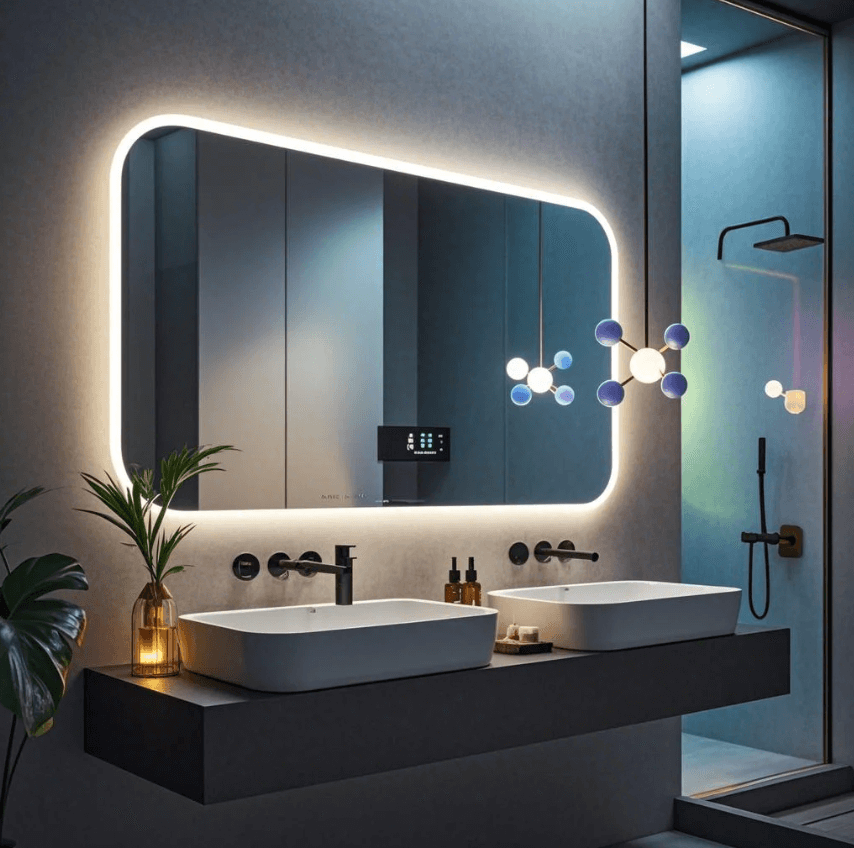
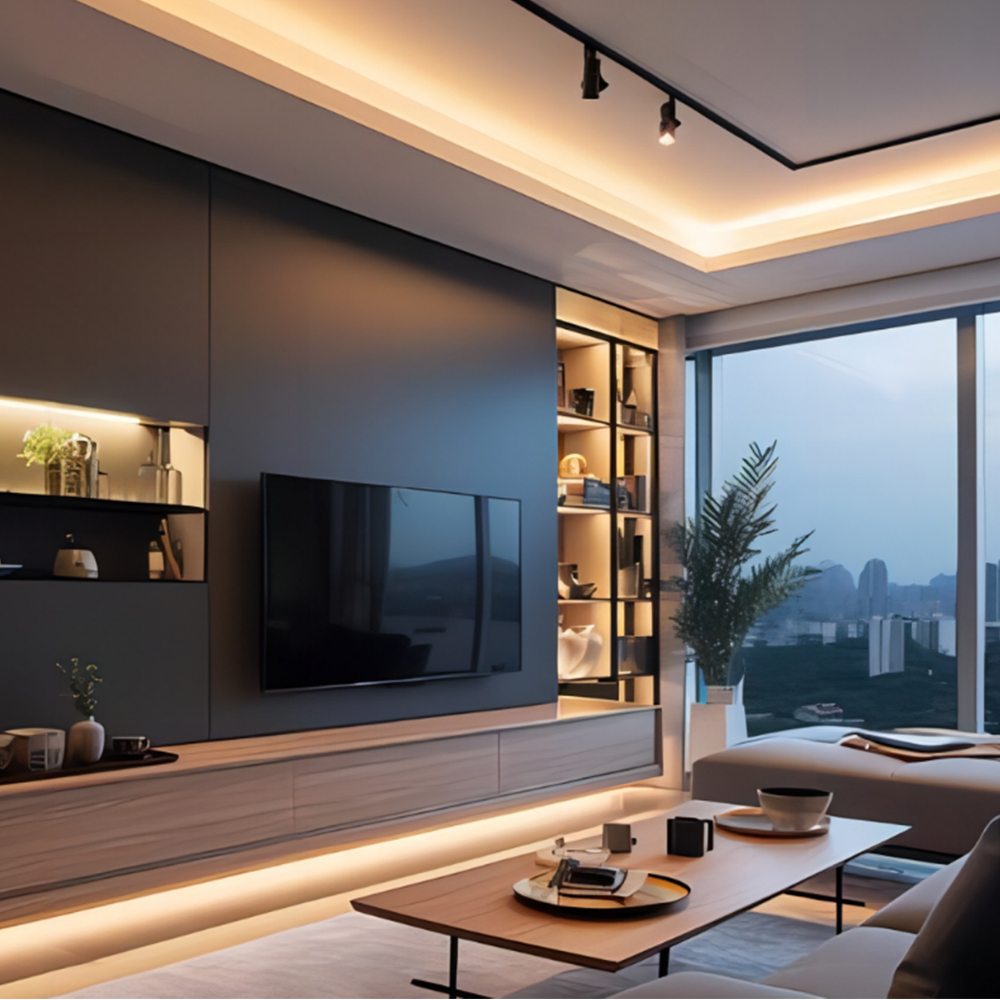
- Application Scenarios:Specify where the LED strip will be used (e.g., indoor decoration, architectural outlines, mirror backlighting, gaming machines, robots).
- Environment Requirements:Consider factors like indoor/outdoor use, coastal areas, waterproofing, anti-fog, and UV resistance.
- Size Requirements:Determine if you need ultra-narrow, ultra-wide, or extra-long strips.
- Brightness:Choose between ultra-bright or standard brightness.
- Color Preferences:Define standard color temperatures or specific custom colors.
- Lifespan:Specify whether the strip will be used temporarily or long-term.
Providing detailed information, design drawings, or reference videos can significantly help designers create the perfect product for your needs.
Once the sales team understands your requirements, they will collaborate with engineers to develop a tailored plan. This may include:
- LED chip models.
- PCB thickness and width.
- LED arrangement.
- Input voltage and power.
- Color temperature.
- Waterproofing levels.
- Controller and wiring details.
The engineering team will create a preliminary design drawing and provide a quote based on the specifications.
- If adjustments are needed, the design and quotation will be revised until the customer is satisfied.
- After accepting the quote, the factory will produce a prototype.
- Testing results and videos will be shared with the customer to review factors like brightness, color, functionality, materials, and craftsmanship.
- If the prototype fails to meet expectations, a new one will be created.
- Once approved, the prototype will be sent to the customer for further testing.
- Feedback from the customer will guide final design adjustments (e.g., improving brightness, adjusting color rendering, or optimizing installation).
- After sample approval, small-scale production is conducted to test real-world performance.
- Any issues discovered will be addressed and corrected.
- Once confirmed, full-scale production begins, with strict quality monitoring to ensure consistency.
- Products are labeled and branded per the customer’s request.
- Secure transportation and protective packaging are employed to ensure safe delivery.
Despite meticulous design and testing, unforeseen issues may arise due to local environments or installation methods.
- A strong after-sales support system ensures effective communication and timely resolution of any problems, enhancing customer satisfaction and product reliability.
This process ensures that the customized LED strips meet both quality standards and specific project requirements.
Common Misconceptions About LED Strips
With over 13 years of experience in LED strip manufacturing, LEDWorker Lighting has noticed that many customers have misunderstandings about LED strips during the design and manufacturing process. Before customizing LED strips for specific applications, it's essential to clarify these misconceptions to ensure better customization decisions:
1,More SMDs Equal Higher Brightness?
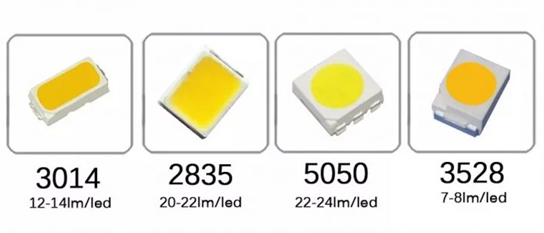
Not necessarily. The brightness of an LED strip depends on several factors:Different sizes of LED chips have varying brightness levels.While more SMDs per meter can theoretically increase brightness, excessive SMDs lead to higher current and heat. For example:A double-row 2835 SMD strip with 240 LEDs per meter (24V input) has a theoretical maximum power of 48W (0.2W x 240).However, due to heat dissipation limitations, professional manufacturers restrict the maximum power of such LED strips to around 18-22W to avoid damaging the LEDs.
COB LED Strips: These can pack up to 840 chips per meter, but their power is limited to 14W due to poor heat dissipation.
Conclusion: More LEDs don’t always mean higher brightness. Other methods like increasing PCB width, using brighter LEDs, or enhancing heat dissipation can also improve brightness.
2,Is a Lower LUX Value Equivalent to a Lower LM Value?
Key Definitions:
- LUX: Measures the amount of light (lumens) spread over a specific area. It varies based on the surrounding environment, distance, and surface area.
- LUMENS (LM): The total amount of visible light emitted by the source.

While LUX depends on distribution, LM measures the total light output. For example:
- The same LM value distributed over a larger area results in a lower LUX.
- LED manufacturers like LEDWorker use tools such as the Spektron coated integrating sphere for precise LM testing.
Conclusion: LM and LUX values are related but not interchangeable. LUX depends on the environment, while LM reflects the light source’s overall output.
3,Higher Power Equals Higher Brightness?
Generally, higher power results in increased brightness, but there are limitations:
- Increasing Current:Excessive current increases heat, reducing LED lifespan.
- Solutions for Higher Brightness:Widen the PCB to allow more current flow.Use thicker copper layers for better conductivity.Select high-efficiency LEDs with higher lumens per watt.Optimize heat dissipation.
Conclusion: Brightness can be achieved through various design approaches beyond merely increasing power.
4,Overestimating Lifespan Expectations
LEDs are often marketed with lifespans of up to 100,000 hours MTBF (Mean Time Between Failures). However:
- LED brightness decreases over time due to lumen depreciation, influenced by factors like temperature, humidity, and ventilation.
- Excessive lumen depreciation (over 50%) makes the product unsuitable for lighting, even if it still functions.
Conclusion: Focus on the rate of lumen depreciation rather than the stated lifespan when choosing LEDs.
5,Confusing Actual and Effective Emission Angles
- Effective Emission Angle: Refers to the angle where the luminous intensity reaches half of the maximum value.
- Actual Emission Angle: The full range within which light is emitted.
- In applications, only the effective angle contributes to usable light.
Conclusion: When calculating the number of products for a project, use the actual emission angle for accurate planning.
Final Thoughts
Understanding LED strip parameters ensures you won’t get fixated on individual specs. There are various methods to achieve your desired lighting effects. Collaborating with experienced LED manufacturers can save time, reduce effort, and result in optimal solutions tailored to your needs.